| |

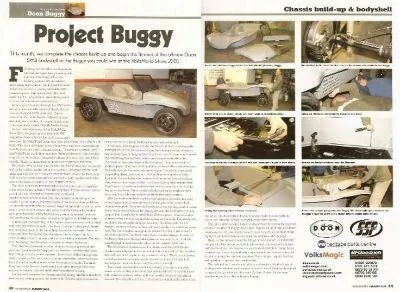
Welcome to part 4 of our Doon Buggy build-up and our monthly visit to the Oldbury workshops of Volksmagic, where this month we complete the chassis build-up and begin the fitment of the chassisall new Doon Buggies SWB bodyshell.
Following on from last months article, we took the opportunity to carry-out a minor re-working of the rear braking system. After much thought it was decided to move away from custom made braided brake hoses and use, more readily available VAG standard parts. This would make life a lot easier for the lucky winner, should they need to carry out any future maintenance.
After a quick rumble through the VAG parts bin we came up with a pair of flexible hoses from an Audi A4 (1999 onwards), these connect to the 'new' Beetle callipers at one end and, via a section of copper brake pipe, to the standard 'classic' Beetle brake hoses.
As you may have seen at the Sandown show, the colour chosen by the boys on your favourite VW magazine was grey and therefore the Volksworld Doon was ordered in Dawn Grey (BS No. 00 A 05).
Why such as strange colour choice you may ask, especially as most Buggiesys are seen in bright colours. "That was the whole idea" said Volksworld's Richard Marcroft, "we decided to go for an 'anti-colour', hence the choice of a grey shell and black wheels. I think it's going to look good and really buck the trend!"
Many contempory cars are now offered in alternative colours, such as the Audi TT which looks good in flat grey, a modern colour which seems to suit the sharp modern lines of the Doon.
No matter what colour you choose, the Buggy style has real 'bounce back ability' and looks cool, no matter what the decade!
The next stage of the build was to permanently bolt the shell to the chassis, but before that let's have a closer look at the Doon shell itself. Designed for the new millennium by Simon Chadwick and Richard Crees, the Doon was built from first principles with a look, which combines equal parts of modern and retro, hence, the Doon strap line of 'the classic evolves'.
The shell, manufactured from self-coloured glass fibre is supplied to the buyer highly polished. The kit comprises of three sections, which included the main body shell, bonnet and combined dashboard/underdash panel. The shellshell features a moulding at the front to take the battery (thus allowing space at the rear to clear an IRS set-up as well as adding much needed weight at the front), a rain lip, wide rear to cover 10” wheels and allow room for twin carbs, hidden wiring conduits (which also add extra strength and a fully finished body return lip around the main shell and bonnet to add extra strength and give a neat finished edge.
The shell also utilizes lightweight core matting in the higher stressed areas to add additional strength without weight. One thing the Doon shell is not and that's flimsy, with designed lines in the mouldings for added strength. There is a thought that the thicker the fiberglass, the stronger it is, but actually after about 5 or 6mm all you are adding is weight. The key with fiberglass is in the design, the more changes in shape the better – a principle the guys have taken on board with the Doon.
For further details, check out the companies company’s web site, the address of which can be found at the end of the article.
The shell was lowered onto the chassis and gently moved into position. Once we were happy with its location - and that the shell was sitting centrally on the chassis - holes were drilled through the shells inner lip. This was done from the underside upwards, using the standard mounting holes in the floor pan as a guide. The inner fixing lip on the Doon is constructed with extra strength fibre tape (similar to carbon fibre) for additional strength for bolting.
Sandwiched between the chassis and the buggy shell is a standard beetle body sealing gasket, cut down to fit. This is glued / bonded to the chassis and shell and is simply squeezed in place and helps to keep the floor pan watertight.
A problem with buggies can be the torsional twist (shaking whilst driving) that occurs because of losing the strength of the standard Beetle bodyshell. To help combat this Doon use custom made under chassis strengthening bars which are shaped to fit within the channels on the outer edge of the floor pans. These are made of 25mm square, 3mm wall steel and also helps distribute the load of bolting the body through the ‘relatively’ thin floorpan. In addition sSpecially shaped top strengthening fixing plates were cut from ?? 3mm steel plate to help s to distribute the load when the body and chassis are bolted together. This and reduces es the chance of the shell developing 'star cracks' from the stresses, a common problem that can be seen on a lot of older buggy builds.
New 10mm stainless bolts and large washers were used andbought and using the original elongated shaped stock washers beneath the chassis, the body was bolted into its final resting position.
With the body now firmly located in place our attention moved to the front of the buggy and the next job was to bolt in place the under-dash strengthening bar. This is made from ?? size steel section Doon decided early on in the development of the kit that a big problem with earlier buggy kits was the lack lustre steering support bar. Doon’s bar is made from 25mm square, 3mm wall steel tubing that fixes to 4 separate locations on the body. The steel plate welded to the strengthening bar becomes the fixing point for the buggy’s steering column, adding yet more rigidity to a notorious weak spot. The whole bar is and bolted (using ?? 8mm stainless fixings) through both sides of the shell, just beneath where the dash will be fixed. As with all the fixings which pass through fiberglass on our project car, the bolts pass through a load spreader plate on the outside of the shell, therefore helping to avoid localized star cracks from forming.
The steel plate welded to the bar, becomes the fixing point for the buggys steering column, adding yet more rigidity to a notorious weak spot.
The dashboard was designed to utilise standard VW beetle clocks and switch gear if required and is easy to drop into position and bolt-up, once again using stainless fixings. There is a cutaway on both sides of the dash, which allows the front roll hoop to fit flush against window frame, again adding extra strength.
The aluminium windscreen frame simply slots into a purpose made recess to stop water leaking underneath and is fixed in place with stainless bolts on either side and sealed beneath with using silicon sealant.ed. The Volksworld Doon is fitted with a satin black - rather than the more normally supplied anodised silver -– frame to compliment the overall look of the buggy. Doon can offer , but canthe screen be produced in any BS colour should you wish to be wacky or simply just match the colour of the body shell.
This slot in fitment also helps to strengthen the frame fixing point, another traditional buggy weak spot! Hands up also those who have weakened or broken windscreen frames by pulling on them, when we've tried to extricate ourselves from the confines of a buggy.
Next on the agenda was the fitting of the bonnet and this is a relatively simply job. The bonnet is laid in place and once you are happy with its location, the bonnet hinges are positioned and their fixing holes marked-up. Once the bolt holes are drilled, the bonnet is bolted in place , once again using stainless fixings.using the custom supplied Doon hinges, again backed with plates to spread the load evenly.
If required the bonnet can utilise a standard beetle bonnet locking mechanism and remote release, the kit being designed to specifically cater for this part.
At last Project Doon was beginning to look like a Beach Buggy !
John Clewer - 2004
|
|